
From the Inventory Management page, Group Administrators can choose the columns which appear in results tables on the Search and Locations pages. This change affects the results tables for all users under their ChemInventory account.
What are table columns?
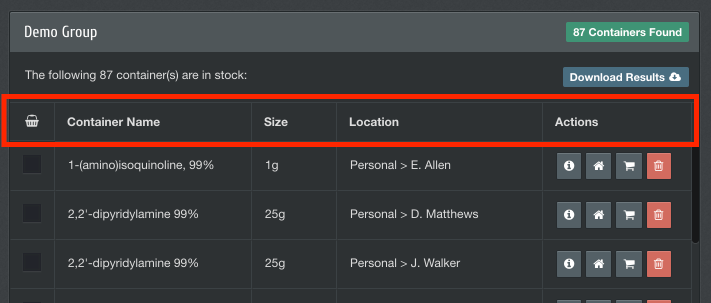
Table columns organize information presented to users in tables on the Search and Locations pages, as shown in the screenshot below. The default columns shown in ChemInventory are collection checkboxes, 'Container Name', 'Size', 'Location' and 'Actions'.
ChemInventory lets you change the columns that are shown in these results tables. This could come in useful for example if you wished to show container CAS numbers or product codes (if you have a custom field created for this) alongside container name.
The fields you can add to tables are listed below:
- Barcode
- CAS
- Comments
- Size
- Date Acquired
- Location
- Supplier
- As well as any custom field
How can I change these columns?
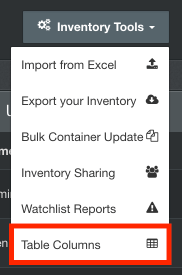
The Table Columns interface can be opened from the Inventory Management page. Click on Inventory Tools, then on Table Columns.
The interface shown below will then appear. On the left side (under 'Available Fields') are listed all the column headings that are available but currently not shown in results tables. On the right side the columns set to appear in tables are listed.
You'll notice that three columns cannot be modified. These are 'Collection Checkbox', 'Container Name' and 'Action Buttons'. We require these columns to be present to ensure that the full functionality of ChemInventory is enabled for all users.
By clicking and dragging items with your mouse, you can move columns between the 'Available Fields' and 'Table Columns' lists. Items in the 'Table Columns' list can be reordered in the same way.
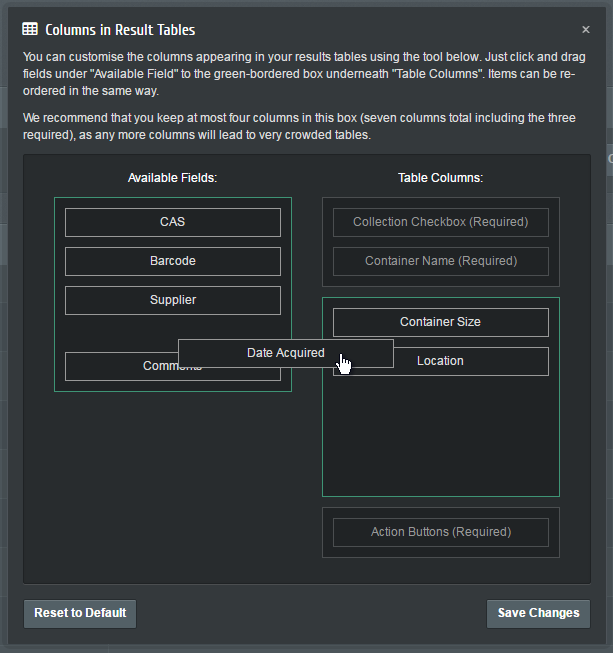
Make sure that you click on the Save Changes button when you're finished to save the new table layout you have selected. If you would like to reset the column arrangement back to default settings, click on the Reset to Default button.
We recommend that you include at most four columns in the 'Table Columns' list (so seven columns in total, including the three required columns), as any more will lead to very cluttered results tables. This could make it difficult for your group members to see relevant information easily.